Tag: gluten free recipe

  • Pancake day – French galettes

    Pancake day – French galettes

    It’s pancake day, it’s lockdown and it’s half term, so I’ve got the day off work. What better to do than feed the kids pancakes until they burst? At breakfast time, we indulged in what’s normally a weekend treat of banana pancakes (recipe here). These are great because they’re super easy to make with only three ingredients and no refined sugar, just the sweetness from the banana. Of course, the kids’ preferred toppings of lashings of syrup and jam counteracts the lack of sugar in the pancakes, but I top mine with almond butter and berries, so it’s a pretty healthy start to the day.

    Onwards to lunch. I prepared some batter to make galettes last night, so all I needed to do today was heat and add toppings. These pancakes are more savoury than our trad. English pancakes, with a nutty flavour, and are great for a light meal. They are made with buckwheat flour, which, although the name suggests otherwise, does not contain actual wheat. It is, however, subject to cross contamination as with oats, so you need to make sure it’s a gluten free brand (two I know of are Doves Farm and Amisa).

    I bought a crepe pan in France years ago, which came with a T shaped implement for spreading the batter and a flat spatula for turning. You could probably use a regular frying pan for this and just swirl the mixture around the pan.

    Ingredients
    250g buckwheat flour
    2 eggs
    1 tbsp oil
    1/2 tsp salt
    500ml water

    Method
    Firstly, you need to whisk all the ingredients together in a bowl and leave the resulting batter to rest for a couple of hours. I usually just cover it with a tea towel and leave it on the counter.

    Secondly get your crepe/frying pan nice and hot and prepare a mixture of melted butter and oil (or just oil is ok), then spread a small amount all over the hot pan – I use a silicone pastry brush for this.

    Spread the batter around the pan using the tools or by swirling the pan before it all sets, and then cook until all the liquid has gone.

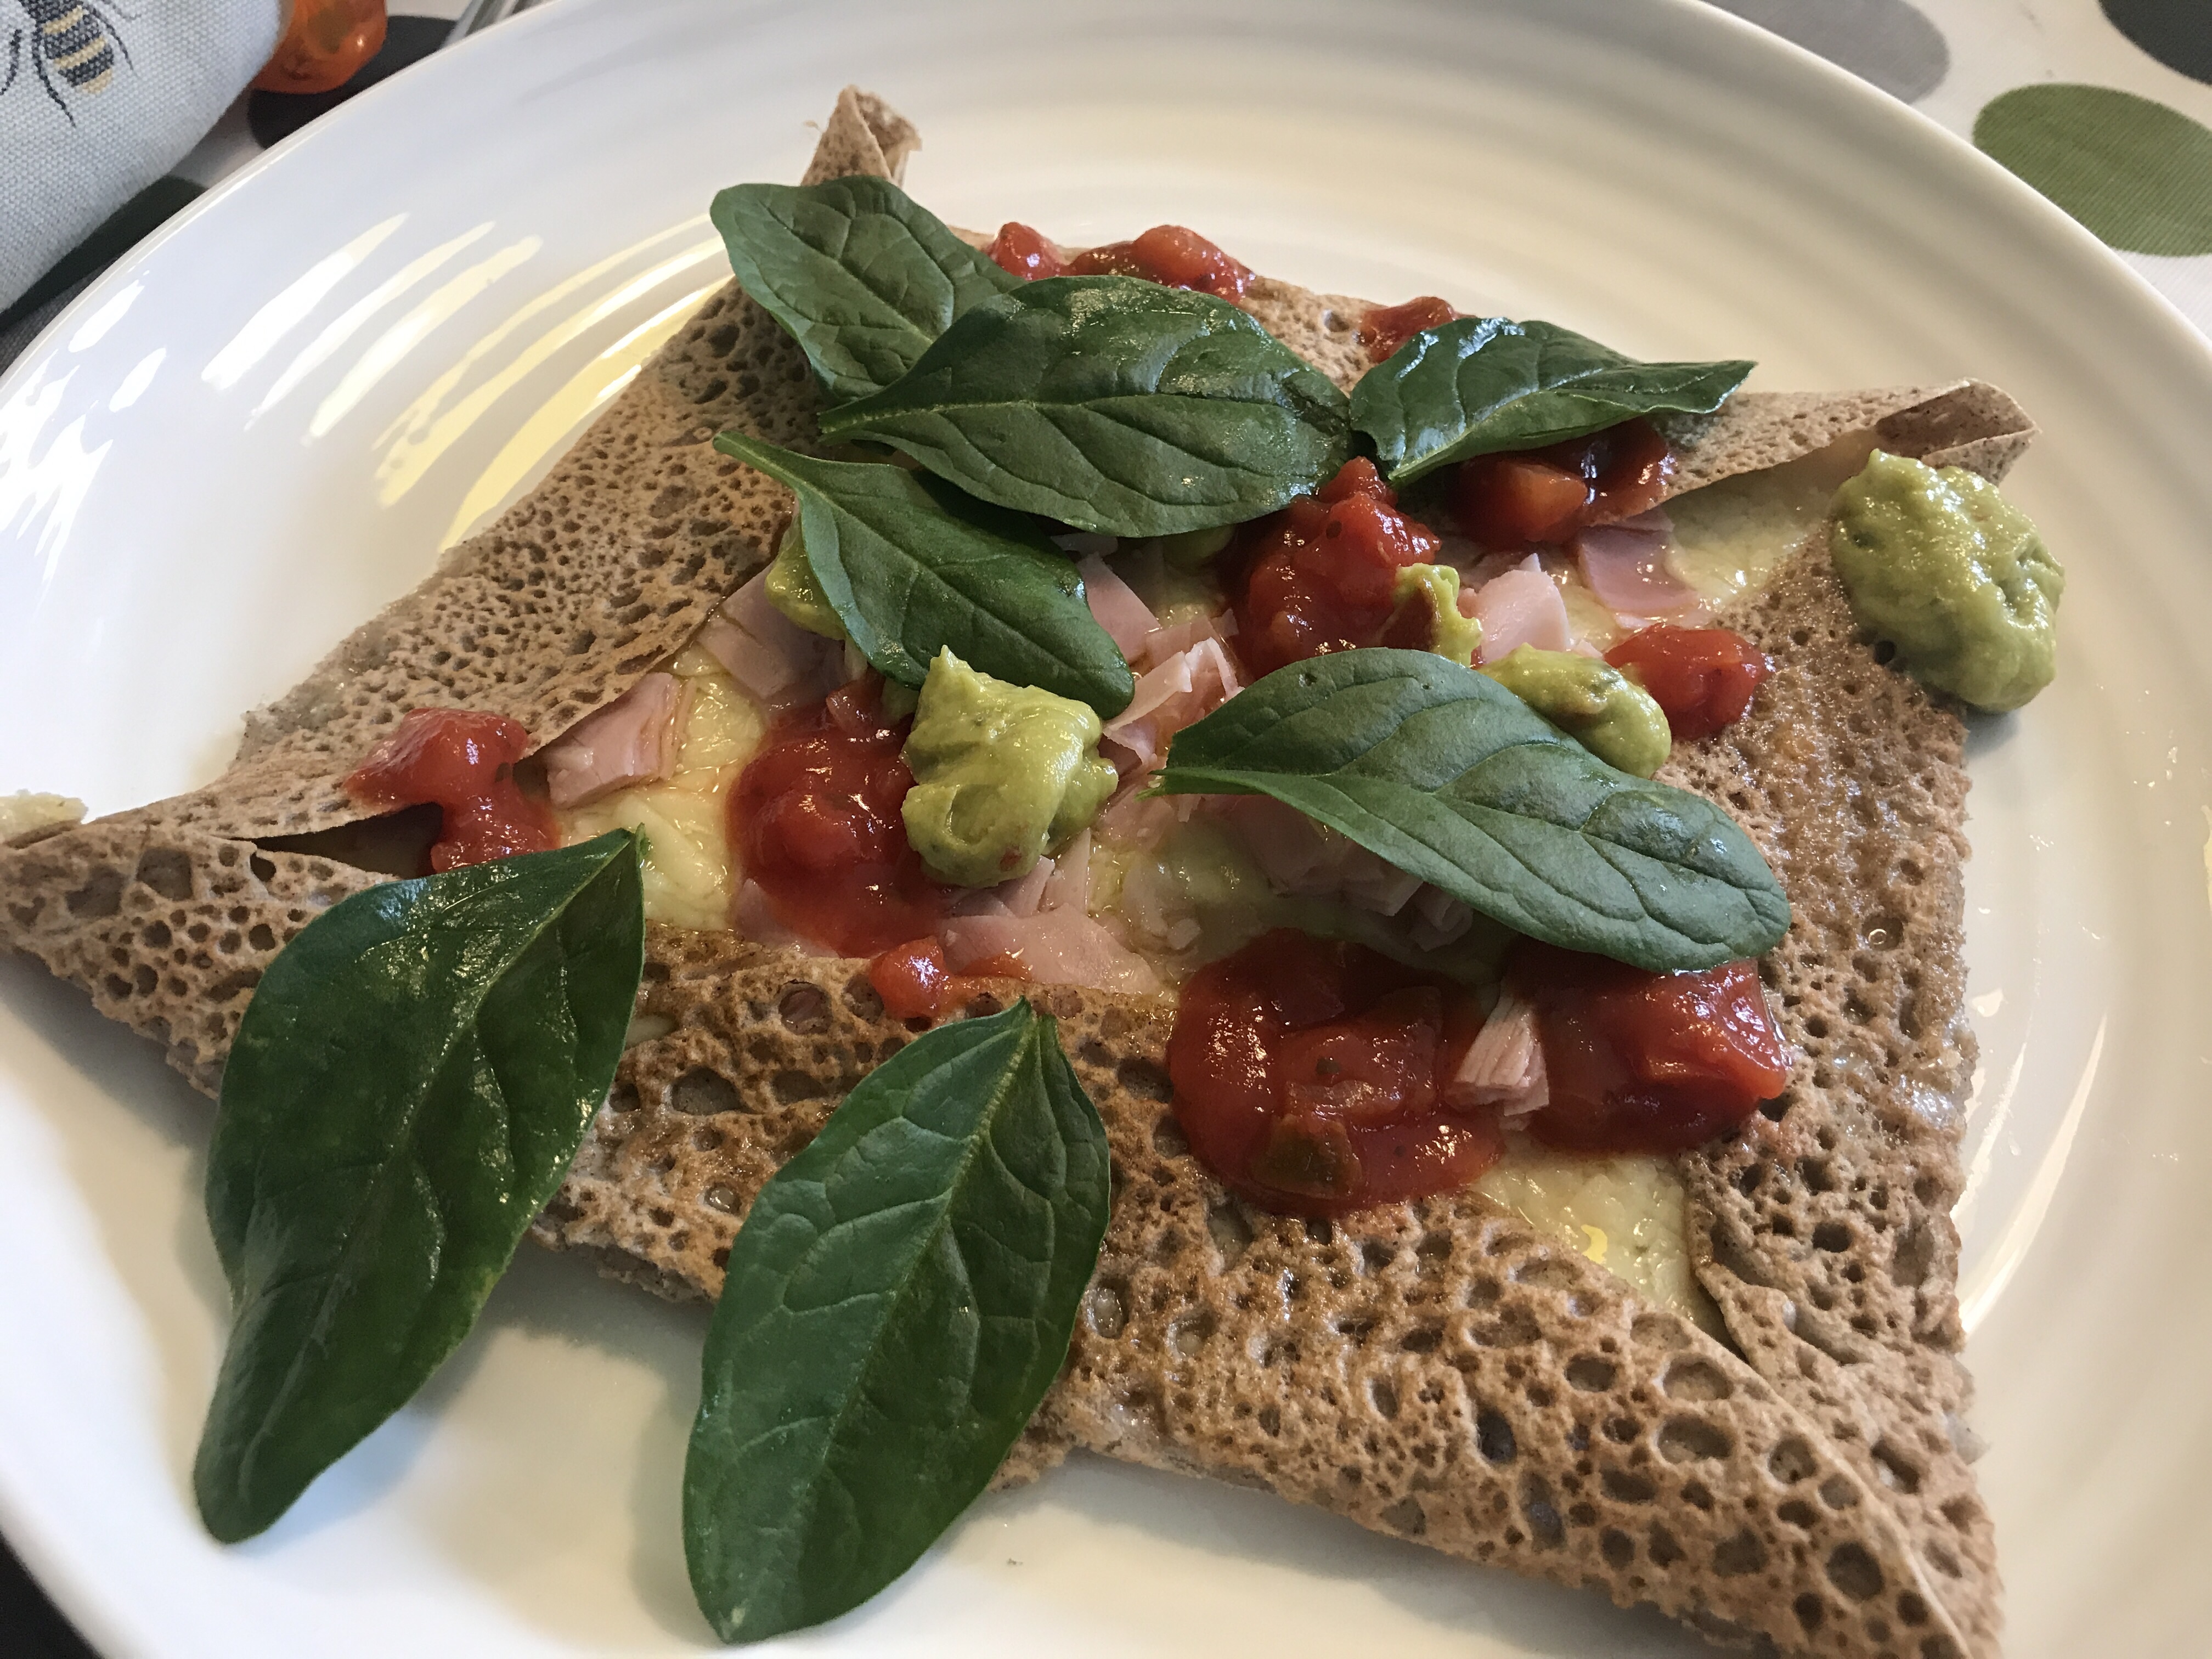
    You can see from the images that the underside has a lovely lattice effect, which you’ll get when the pan is hot enough. It might take a few goes to get this right. As with all pancakes, the first one is often a bit funny.

    I cooked all mine in a batch last night and just stacked them and covered in cling film over night, but you can leave the cooked pancake in the pan and put the toppings straight on. We’ve used grated Cheddar cheese and ham. Once the cheese has melted, fold in the sides to make a square shape and slide onto a plate. The kids had theirs with beans, but the grown ups went for a bit of left over salsa and guacamole that was in the fridge.

    For tea, we’ll be making some filled crispy pancakes. We’d better go on our daily walk to work up an appetite.

    Thanks to Paulette and Ellie at BBC Radio Sheffield for inviting me on this morning to talk about all things pancakes.

  • Smoky ribs

    Smoky ribs

    We’ve been missing eating out during lockdown, and I feel like I’ve been cooking so much. I try to mix it up a bit so we have a lot of variety and I’ve subjected the family to all sorts of new recipes. Some have worked brilliantly, and some consigned to the ‘never again, mum!’ bin. This is one of the former and frankly, I regret not trying to make this sooner, as it was so easy!

    For the ribs, I bought 4 racks of ribs that had about 6-7 ribs on each, and one rack each was plenty for a main course with some sides. There are various recipes out there for smoky marinade, but I figured it’s pretty much the same as shop-bought BBQ sauce, so I just used a bit of Sweet Baby Ray’s BBQ sauce. I also use it for making pulled pork. These two dishes are the best things the slow cooker has ever produced.

    Run a small amount of oil around your slow cooker pan, pop in the ribs one rack at a time, and brush a bit of sauce on each. I had to overlap the ribs in a bit of a stack. Then cook on low for 7-9 hours or high for 3-5 hours. The time might depend a bit on your slow cooker, but mine is reasonably new and comes to temperature quite fast (considering it’s a slow cooker!) so it generally takes the lower amount of time.

    Once cooked, lift each rack carefully onto an oven tray, baste with more BBQ sauce and grill (or BBQ?) until they start to char a bit round the edges. 

    For the smoky beans, I use a fairly quick vegan recipe:

    • 1 shallot
    • 1/2 tsp cumin
    • 1/4 tsp smoked paprika
    • 1/2 tsp celery salt (I’m not sure you’d notice if this wasn’t in it?)
    • 1 tbsp tomato puree
    • 1 400g tin cannellini beans (or any beans)
    • 1 tsp maple syrup
    • 100ml tomato passata

    Soften the shallot in a bit of oil for 5 minutes. Add the spices and allow them to cook out for a minute before adding the tomato puree. Cook 2 more minutes then pop in the beans and the rest of the ingredients with some seasoning. Simmer until the sauce is the desired consistency. Add water if necessary.

    The slaw is a barbeque staple in our house, just shredded cabbage and carrot with full fat mayonnaise and a bit of seasoning.

    For the corn cobs, I like them best cooked on the BBQ but the weather wasn’t great, so we just cooked them in simmering water for ten minutes. 

    Enjoy! 

  • Garlic bread!

    Garlic bread!

    We love a bit of garlic bread with lasagne. And I’ve found that the Schar ciabatta rolls make perfect individual sized portions. Which is great in our family as it means the kids can’t snaffle it all before I get to the table.

    I think the best way to make garlic butter so it doesn’t taste raw is to bake a few garlic cloves in their skins for a about ten minutes minutes at 180C. They don’t take long to cook through, just until they are soft and before they explode (!) like one of mine did. I’ve read that you can cook them in a foil pouch, which would take more like 40 mins but is much lower risk.

    Once cool enough to handle, chop the end off the clove and squeeze out the soft garlic. Then mash them with a pestle and mortar into some soft butter with a sprinkling of Italian herbs. 

    Slice down into the rolls but without cutting all the way through – five cuts in each roll gave six decent sized pieces. Then spread a generous amount of the garlic butter in each.

    Schar’s instructions suggest baking the rolls at 180C for 5-7 minutes, but I cooked them a bit longer to give a bit of crunch.

    Most supermarkets sell gluten free lasagne sheets, which I use with a home-made bolognese sauce and a simple bechemel sauce, and plenty of parmesan on the top. I make that using a butter and gluten free plain flour roux, milk and a bay leaf.  I like to hide a bit of finely grated carrot and courgette in the bolognese, to sneak in a bit of extra veg to the meal – nobody’s ever noticed. 🙂

  • Gluten free hoisin duck with special fried rice

    Gluten free hoisin duck with special fried rice

    In the years BC (before coeliac) we used to get a takeaway from our local Chinese on a Friday night sometimes. We always really looked forward to it but it was generally a bit disappointing. I can’t really put my finger on why, but I guess there was a lot of MSG and I distinctly remember the egg in the fried rice looked pre-cooked and thrown in at the last minute.

    Other than stir fries, Chinese food these days is generally reserved for special trips to Hui Wei in the centre of town, which has an awesome gluten free menu and now delivers if you live within 4 miles. Tragically, we live a bit too far out of town, although that’s undoubtedly a benefit for the waistline!

    Anyway, I was very excited when I came across this Sweet Mandarin gluten free hoisin sauce on Ocado. In fact I’m now even more excited because I’ve just looked at their website and they have a whole gluten free range, including BBQ, black bean and OK sauce, which are also dairy free and nut free. They have a restaurant in Manchester too.

    Back in the room…    When I think of hoisin, I generally think of duck, so I decided to try making hoisin duck with special fried rice and prawn crackers for a Friday night treat. (Check the ingredients on shop bought prawn crackers – some are gluten free, others not.)

    I don’t cook duck very often, and when I do it’s usually the breast, so I spent a while researching how to get crispy duck legs and lovely soft meat. The answer, which worked a treat, was a collaboration of a few things I read and involved almost confit-ing them, so they took a couple of hours to cook, but it was really worth it.

    The meal was divine, and so much better than our disappointing old takeaways. I wish I’d taken some more pictures of the duck, but when I do this again (I bought 2 bottles of sauce) I’ll update this post.

    So, for the approximate recipe…

    For the duck legs:

    One leg per person for a main course. Pat the duck legs dry with kitchen roll, then prick the skin all over with a sharp knife, but pierce the skin only, not the flesh.

    Find the smallest dish the four duck legs will sit in with as little extra space as possible. Season generously and pour over a little oil (I used groundnut), then bake in the oven for 90 mins to 2h at about 160C (no need to preheat the oven). The holes in the skin let all the fat come out and they will cook partly submerged in it so they don’t dry out. Towards the end, you can increase the temperature to 180C to crisp the skin.

    Leave to rest then tear apart with a couple of forks and serve warm, with the hoisin sauce straight from the bottle. You could mix the sauce into the duck, of course.

    Forget the spring onions in the fridge and BBQ them on Sunday instead like I did, or slice them on a jaunty angle and sprinkle on the duck for a bit of colour and freshness at the end.

    For the special fried rice:

    • basmati rice
    • pancetta
    • sliced onion
    • sweetcorn
    • peas
    • spring onion
    • chicken and / or prawns
    • 2 eggs, beaten
    • gluten free soy sauce (I use Kikkoman but there are others)
    • oil (I use groundnut for oriental food)

    Cook, drain and cool the rice in advance. I used about a cup and a half of basmati rice for four of us, rinsed under cold water and simmered in plenty of boiling water. The secret is to not stir the rice at all during the cooking and it comes out perfectly every time.

    In a wok, fry a handful of pancetta in a teeny bit of oil until it’s becoming crispy, then add in a handful of onions sliced sufficiently thinly that your 6 year old might not notice them. Once softened, put in a handful each of peas (still frozen is fine) and sweetcorn. If using raw chicken or prawns, add before the peas and sweetcorn and cook through, or if cooked, they can go in after.

    Give everything a good glug of soy sauce, then tip in the rice and stir through. Once the rice has been heated well, pour in the beaten egg and keep everything moving for a few minutes at a medium to high temperature to mix it through and cook the egg, then serve.

    I think some people say to make a space in the middle of the rice mix and cook the egg in that before stirring it together, but I’m not that keen on the big lumps of egg – I prefer it cooked through the rice.

    We’ve had the special fried rice on its own plenty of times – it’s one of my comfort foods. With a bit of chicken and / or prawns, it’s a filling meal by itself, but with the hoisin duck and prawn crackers, it was a real treat.

  • Mini puds

    Mini puds

    We had some friends round for tea a few weeks ago and I fancied doing some mini desserts to nibble at in the evening. After a lot of wasted time looking through recipe books and failing to find quite what I wanted, I managed to get some better inspiration from the good old web.

    img_5416I made a couple of simple but effective mini-puds, as well as a third I’ve not included, that was very much edible, but not as good and much more faff.

    The easiest was strawberries (I know, not quite in season) dipped in a mixture of melted dark and milk chocolate. I use Green and Black’s as a default, which is deemed safe by Coeliac UK. I rolled the dipped strawberries in either chopped pistachios for a bit of colour, or popping candy for a fizzy crunch! (I was very pleased with myself for thinking that up.) These went down rather well with the kids. 🙂

    Next was something I’ve been intending to try making for ages, peanut butter cups. Frustratingly, I only took photos of the finished article, so you can’t see the stages of how they were made, but it was very simple.
    I followed this Martha Stewart recipe, which involves making alternate layers of melted dark chocolate and a mixture of peanut butter with melted white chocolate. Again, I used Green and Black’s white and the dark 70%.

    I used petit four cases (unfortunately I could only find brown ones) in a mini cake tray and topped them with unsalted peanuts, which I chopped and baked to give a bit of colour and crunch. You need to get the nuts on quickly while the chocolate on top is still wet, so they stick.

    Both of these are easy crowd pleasers. I need to come up with a third to go with them though. Suggestions on a postcard… or rather in the comments.

    Ironically the other day, somebody on Twitter suggested an even quicker version of peanut butter cups, which is to dip a square of dark chocolate in some peanut butter. I immediately regretted finding out about about this possibility, as I went straight to try it out. A very good return for next to no effort, but definitely something I kind of wish I could un-know.


  • Banana bread 

    Banana bread 

    Bananas generally get scoffed in our house. I like them a bit under-ripe, so they have a bit of bite, then there’s usually a window of opportunity of a few days when the boys will eat them, before they start to go brown. After that, we usually keep them to make pancakes at the weekend.  Recently, my boys have been asking me to save them to make banana bread instead, so I’ve been experimenting with a few recipes from t’internet.

    Our new fave is this one, from the I Quit Sugar website. I can’t copy the recipe here, unfortunately, but I wanted to share the link because it’s so good and very easy to make.

    The recipe uses dry ingredients and wet ingredients, measured separately, then mixed together. The wet ingredients are 3 bananas, 2 eggs, coconut oil, milk, cider vinegar and vanilla essence.

    The dry ingredients are: buckwheat flour, almond meal (I assumed this meant ground almonds) baking powder & soda, salt and a variety of spices. I used cinnamon, ginger, allspice and nutmeg, as I didn’t fancy the cardamom suggested – it seemed too exotic for banana bread.

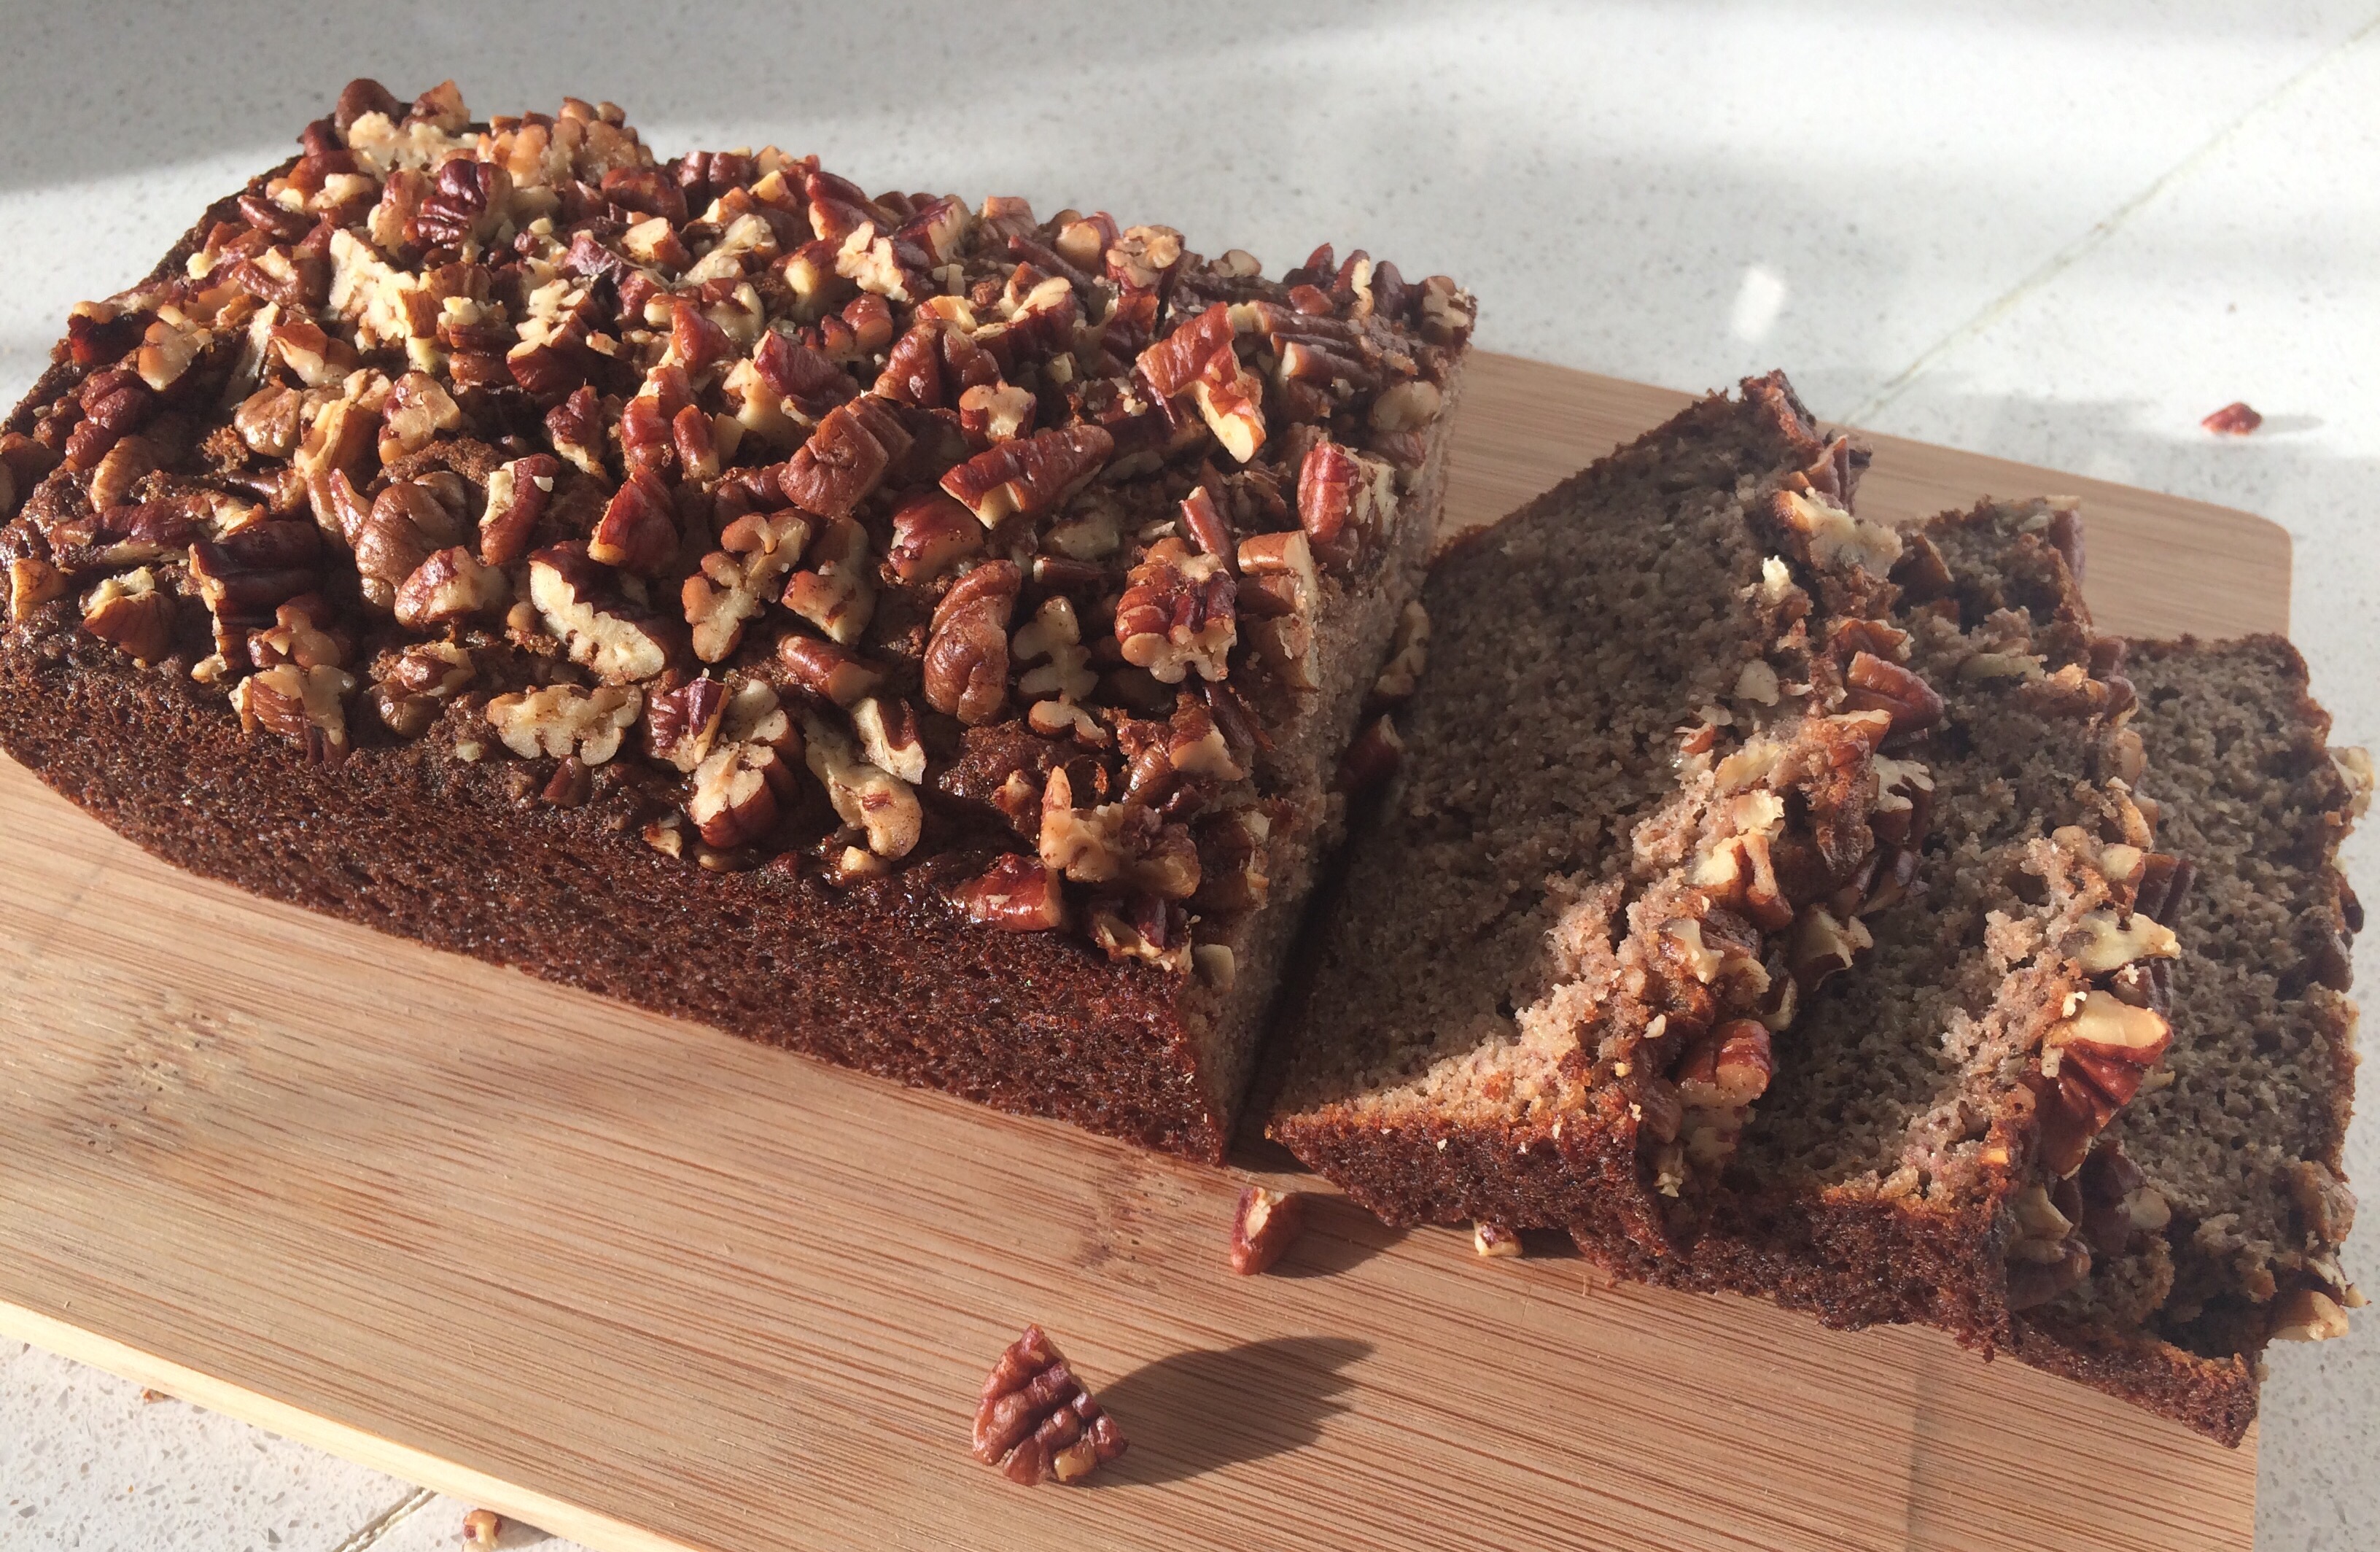
    It also has an interesting topping of pecans drizzled with coconut oil and cinnamon, which we really liked and did the second time I made it. They give it a bit of texture, but soften over a couple of days – unless you eat it quickly, of course. I chopped mine up to make the loaf easier to slice.

    One tip I would give is to grease the loaf tin and pour the mixture in directly, rather than faffing about lining with paper. My loaf tin is fairly old but it is non-stick and it turned out very easily.

    As you’d expect from IQS, there’s no added sugar in the recipe, so it feels very virtuous and the kids think it’s cake. Winner. Best served still warm and slathered with butter.

  • Waffle experimentation

    Waffle experimentation

    I was very excited to get a waffle maker for Christmas – I’ve been after one for quite a while as part of my breakfast diversification programme. 😀

    My waffle maker is this Cuisinart one that makes two square waffles at a time. I can’t give the lowdown on any other machines as mine was a gift so I didn’t do the research myself. But I’m very happy with it. It’s easy to use and easy to clean, as the irons can go in the dishwasher.


    The challenge is to find a healthy, gluten free recipe that doesn’t contain too much sugar. That way it doesn’t seem so bad that the boys want to fill all the holes with maple syrup and jam!

    I’ve been trying out this recipe from cookieandkate.com, which uses oat flour.

    I’ve listed below the ingredients to make eight waffles, as once you’ve heated the iron up, it’s easy to just keep making them.

    3 cups oat flour (256g)
    3tsp baking powder
    1 tsp salt
    Good pinch of cinnamon powder
    1 1/2 cups milk
    10 tbsp melted butter
    4 eggs
    2 tsp vanilla extract

    The original recipe has maple syrup too – 4 tbsp for this quantity – but I’ve made them without so far with good results.

    It’s a really simple recipe: You measure out the wet and dry ingredients separately then combine in one bowl. It’s important to sieve the flour so it doesn’t all clump together. And I’ve also had to microwave the wet ingredients for a few seconds because the butter solidified a bit when I spooned it into the cold milk and eggs.

    Once mixed, I spent quite a while using a wooden spoon to get rid of all the lumps. Then about ten mins  or so to let the mixture rest while the waffle iron heats up, which is important.

    My waffle iron takes one full ladle of mixture per waffle and this mixture makes exactly eight waffles. The waffles cook in my iron in about seven minutes. They are very pleasing to make as you just pick the freshly cooked waffle out of the iron and pour in the next ladle of mixture. Hardly any mess and when they’re hot they have a lovely vanilla smell. If you’re lucky, a little bit spills out of the main waffle shape, and you get to snap it off for a sneaky bite!

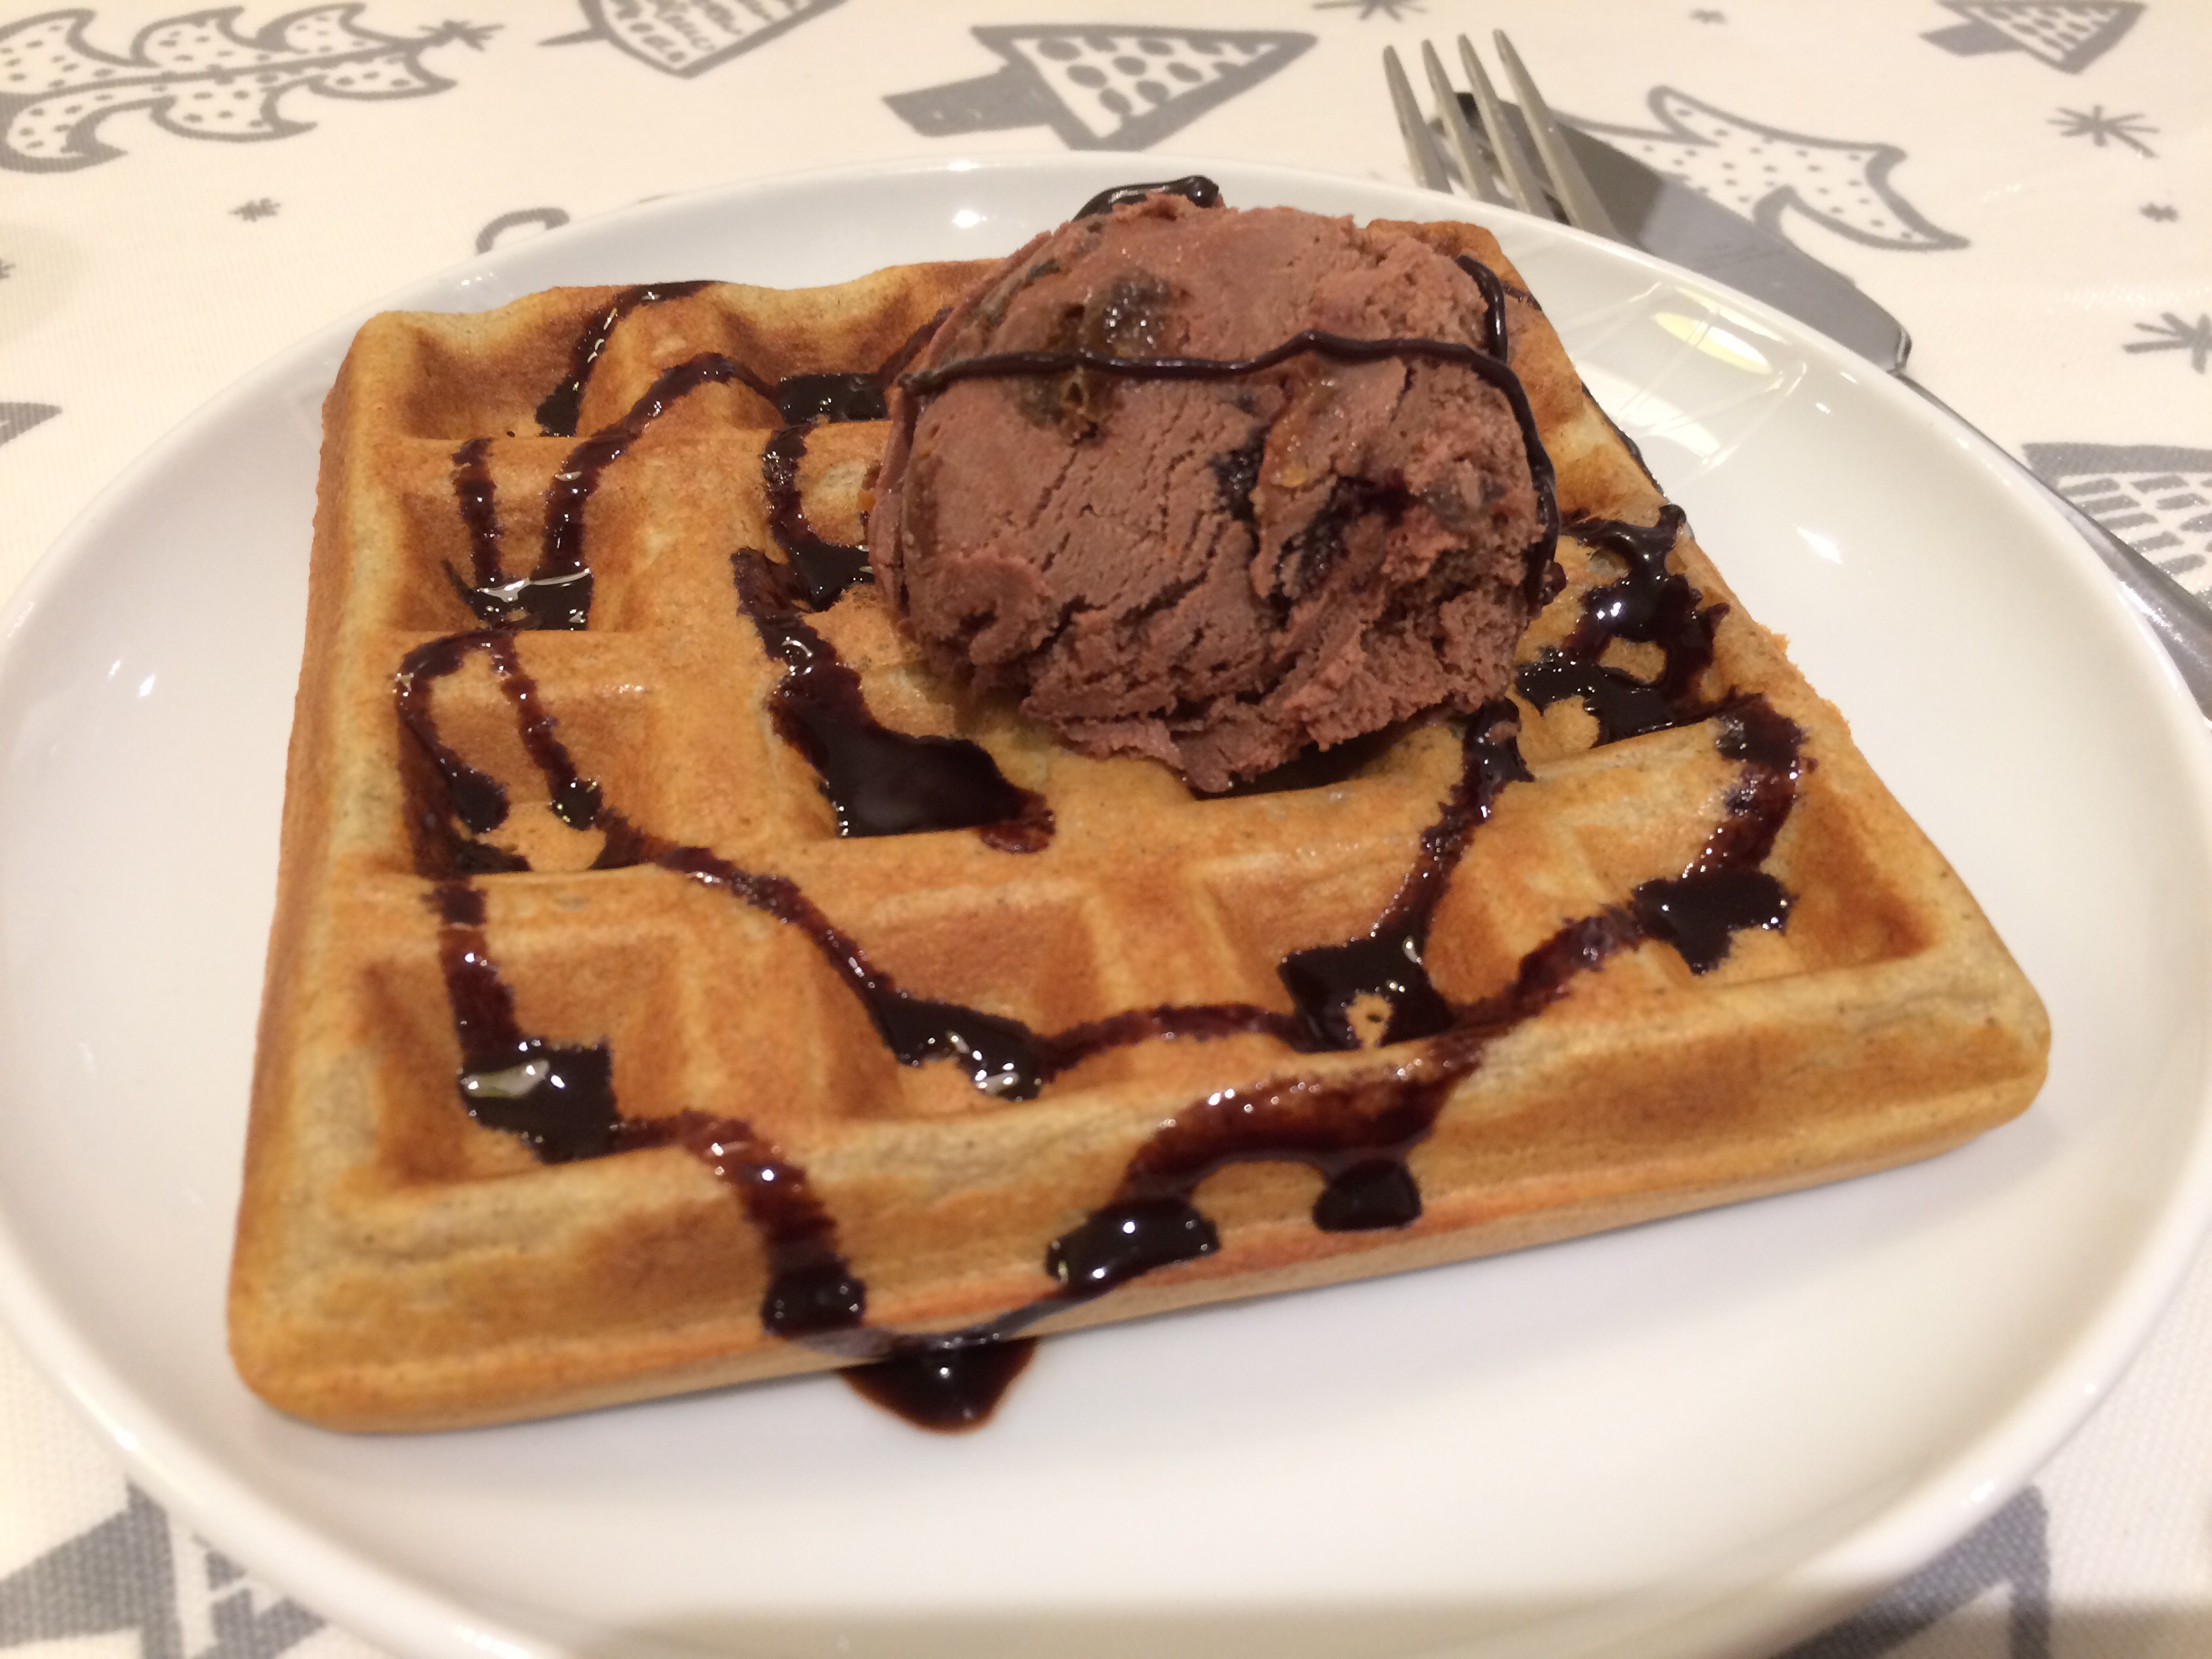
    We enjoyed our first batch of waffles as a pudding, using up the last of my Christmas ice cream. (One for a future post, maybe…) It was absolutely delicious with a really great texture, after a few attempts to get the cooking time right!


    The waffles freeze very well. I put them in a bag, separated with greaseproof paper, and when required, cooked them from frozen under the grill. That makes for a fairly quick, filling breakfast.

    I think the waffles might do well with savoury toppings like egg and beans after being grilled from frozen, as grilling gives them a bit more bite. We tried them with egg and beans straight from the iron and they lost their substance a bit.

    I will probably continue testing out different recipes. You can also add interesting ingredients to the mix for a different flavour. I will try not to become a waffle bore…

  • Yorkshire puds

    Yorkshire puds

    I’ve been experimenting with a recipe for gluten free Yorkshire puddings and managed to create a recipe that I think replicates the texture very well, albeit without much of a rise. They look a bit more like concave buns but they taste great.
    They’re really simple to make because you just lob all of the ingredients in a blender. Give them a good whizz together and pour the batter into smoking hot oil – I use groundnut. The mixture yields 12 puds made in a bun tin. I have plans to test it out as toad in the hole…

    35g Gram flour
    35g Rice flour
    30g Corn flour
    1 egg
    200ml milk

    Bake for 20 mins or so at 230C.


  • Puy lentils with squash and ham

    Puy lentils with squash and ham

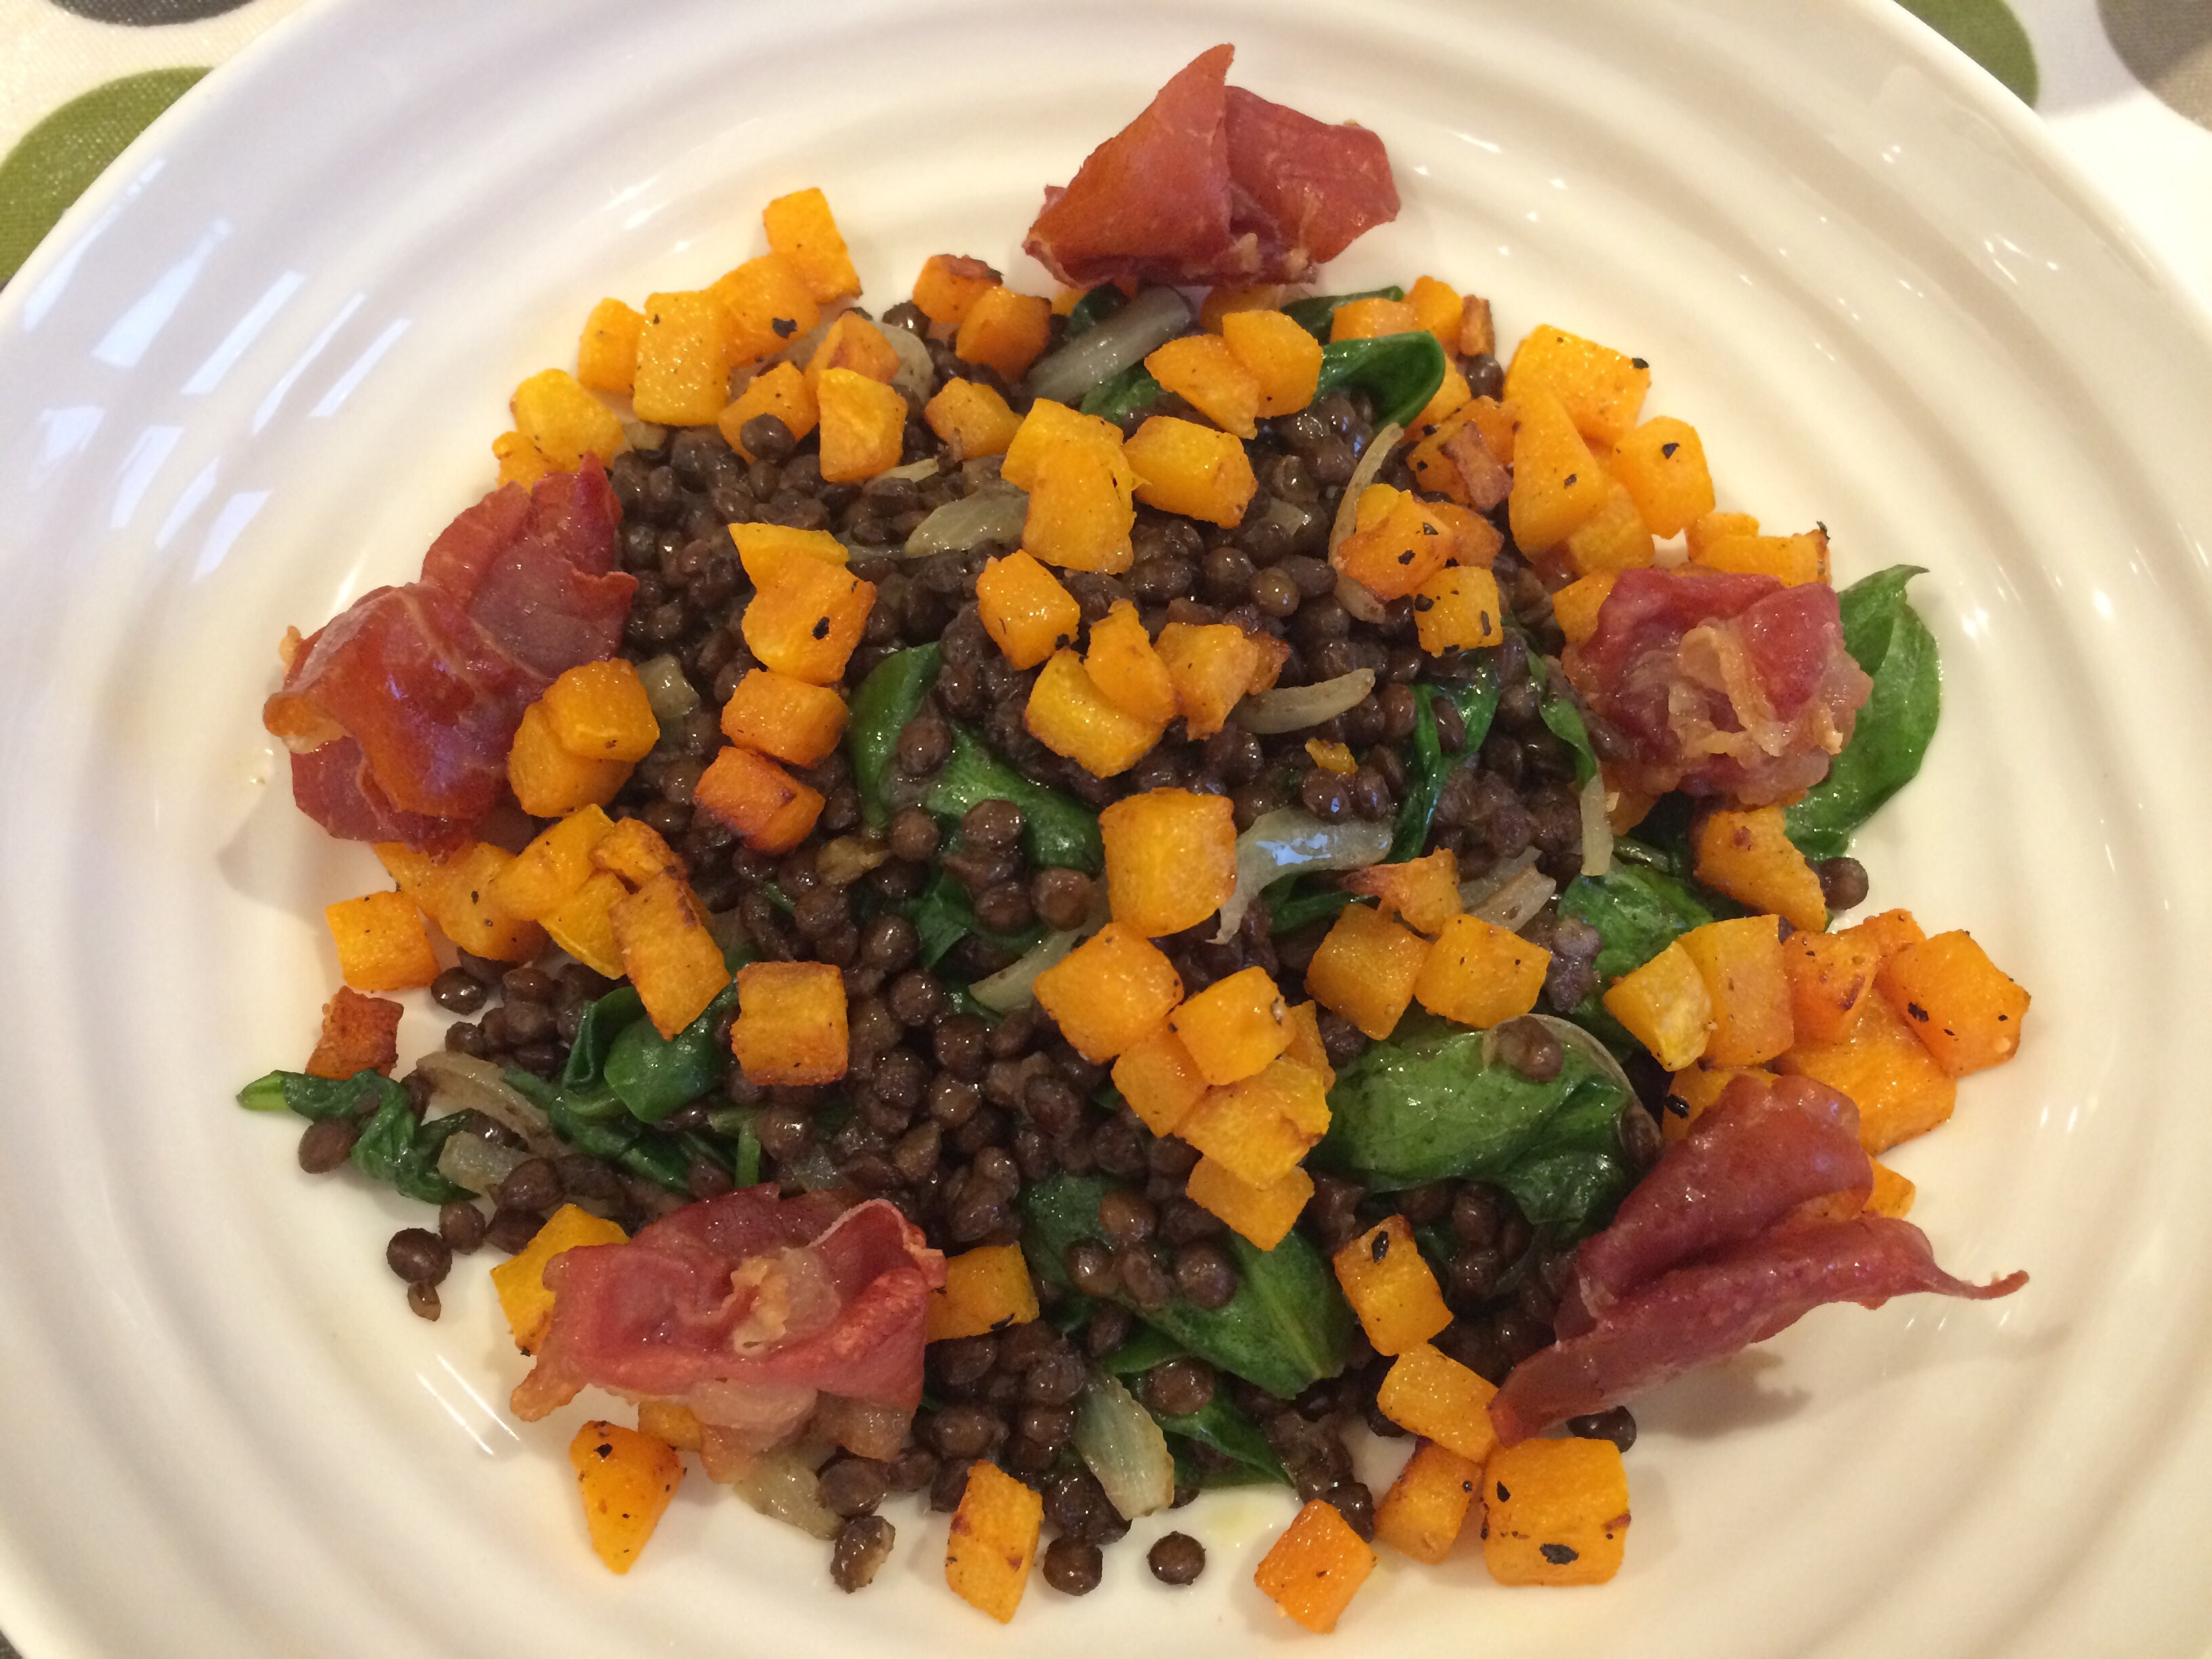
    A couple of weeks ago, I posted about my top five naturally gluten free products. One of them was these ready prepared Puy lentils from Merchant Gourmet. I just thought I’d share a randomly created meal I used them in this week, as it’s quite quick, nutritious and very tasty. And it’s very colourful – I keep telling my kids it’s important to ‘eat a rainbow’.

    To begin with, cut a few inches of butternut squash into about half centimetre cubes (so they cook quickly!) and bake them in the oven at 200C with olive oil, garlic (I used dried ground garlic from a grinder, which is a bit lazy) and seasoning. If you cut them nice and small, they only take about 25 mins in a hot oven, turning occasionally.

    I had some nice prosciutto in the fridge so I scrunched pieces into loose balls and popped those on the tray with the squash for the last ten minutes to crisp up.

    In the meantime, slice half an onion and soften in olive oil, then add the lentils (1 pack) to the pan to warm through with just a splash of water to prevent them sticking. (Or heat in the packet in the microwave for a minute then add to the pan.)

    Next add a handful of spinach leaves to wilt amongst the lentils and onions, then pile the warm mixture into a bowl to serve. Sprinkle on the baked squash and place the crispy ham round the edge.

    This made enough for 2 as a satisfying weekday tea.


  • Fast food – prawn cocktail 

    Fast food – prawn cocktail 

    We had a perfect avocado in the fridge on Tuesday. Everyone knows how small the window of opportunity is in between unripe and completely brown.

    So we opted for a retro prawn cocktail for lunch, which was rather delicious. I tend to keep a bag of prawns in the freezer, as they’re great to lob in with some pasta for the kids, stir fries, curries or for BBQing when the weather is better.

    We made our own Marie Rose sauce using Hellmann’s mayonnaise* and Heinz Ketchup**, in about equal measures, with some smoked paprika to season.

    Sliced avocado, some salad leaves and a quick blast in a frying pan for the prawns. And it only took about 5 mins.


    *Although no mention is made on their website, Hellmann’s features in the Coeliac UK directory as being suitable for coeliacs.

    **Heinz’s website says they are on their way to “designate all our gluten free products as such”, which is good to hear!