Tag: Gluten free

  • Tiramisu cupcakes and the best ever tip I learned about gluten free baking

    Tiramisu cupcakes and the best ever tip I learned about gluten free baking

    Last week I had some spare mascarpone left over from making a delicious gnocchi bake. Craving something sweet, I decided to have a go at making some tiramisu flavoured cupcakes with the mascarpone as a topping. Tiramisu is one of my all time favourite desserts, so I thought I’d see if I could recreate the flavour.

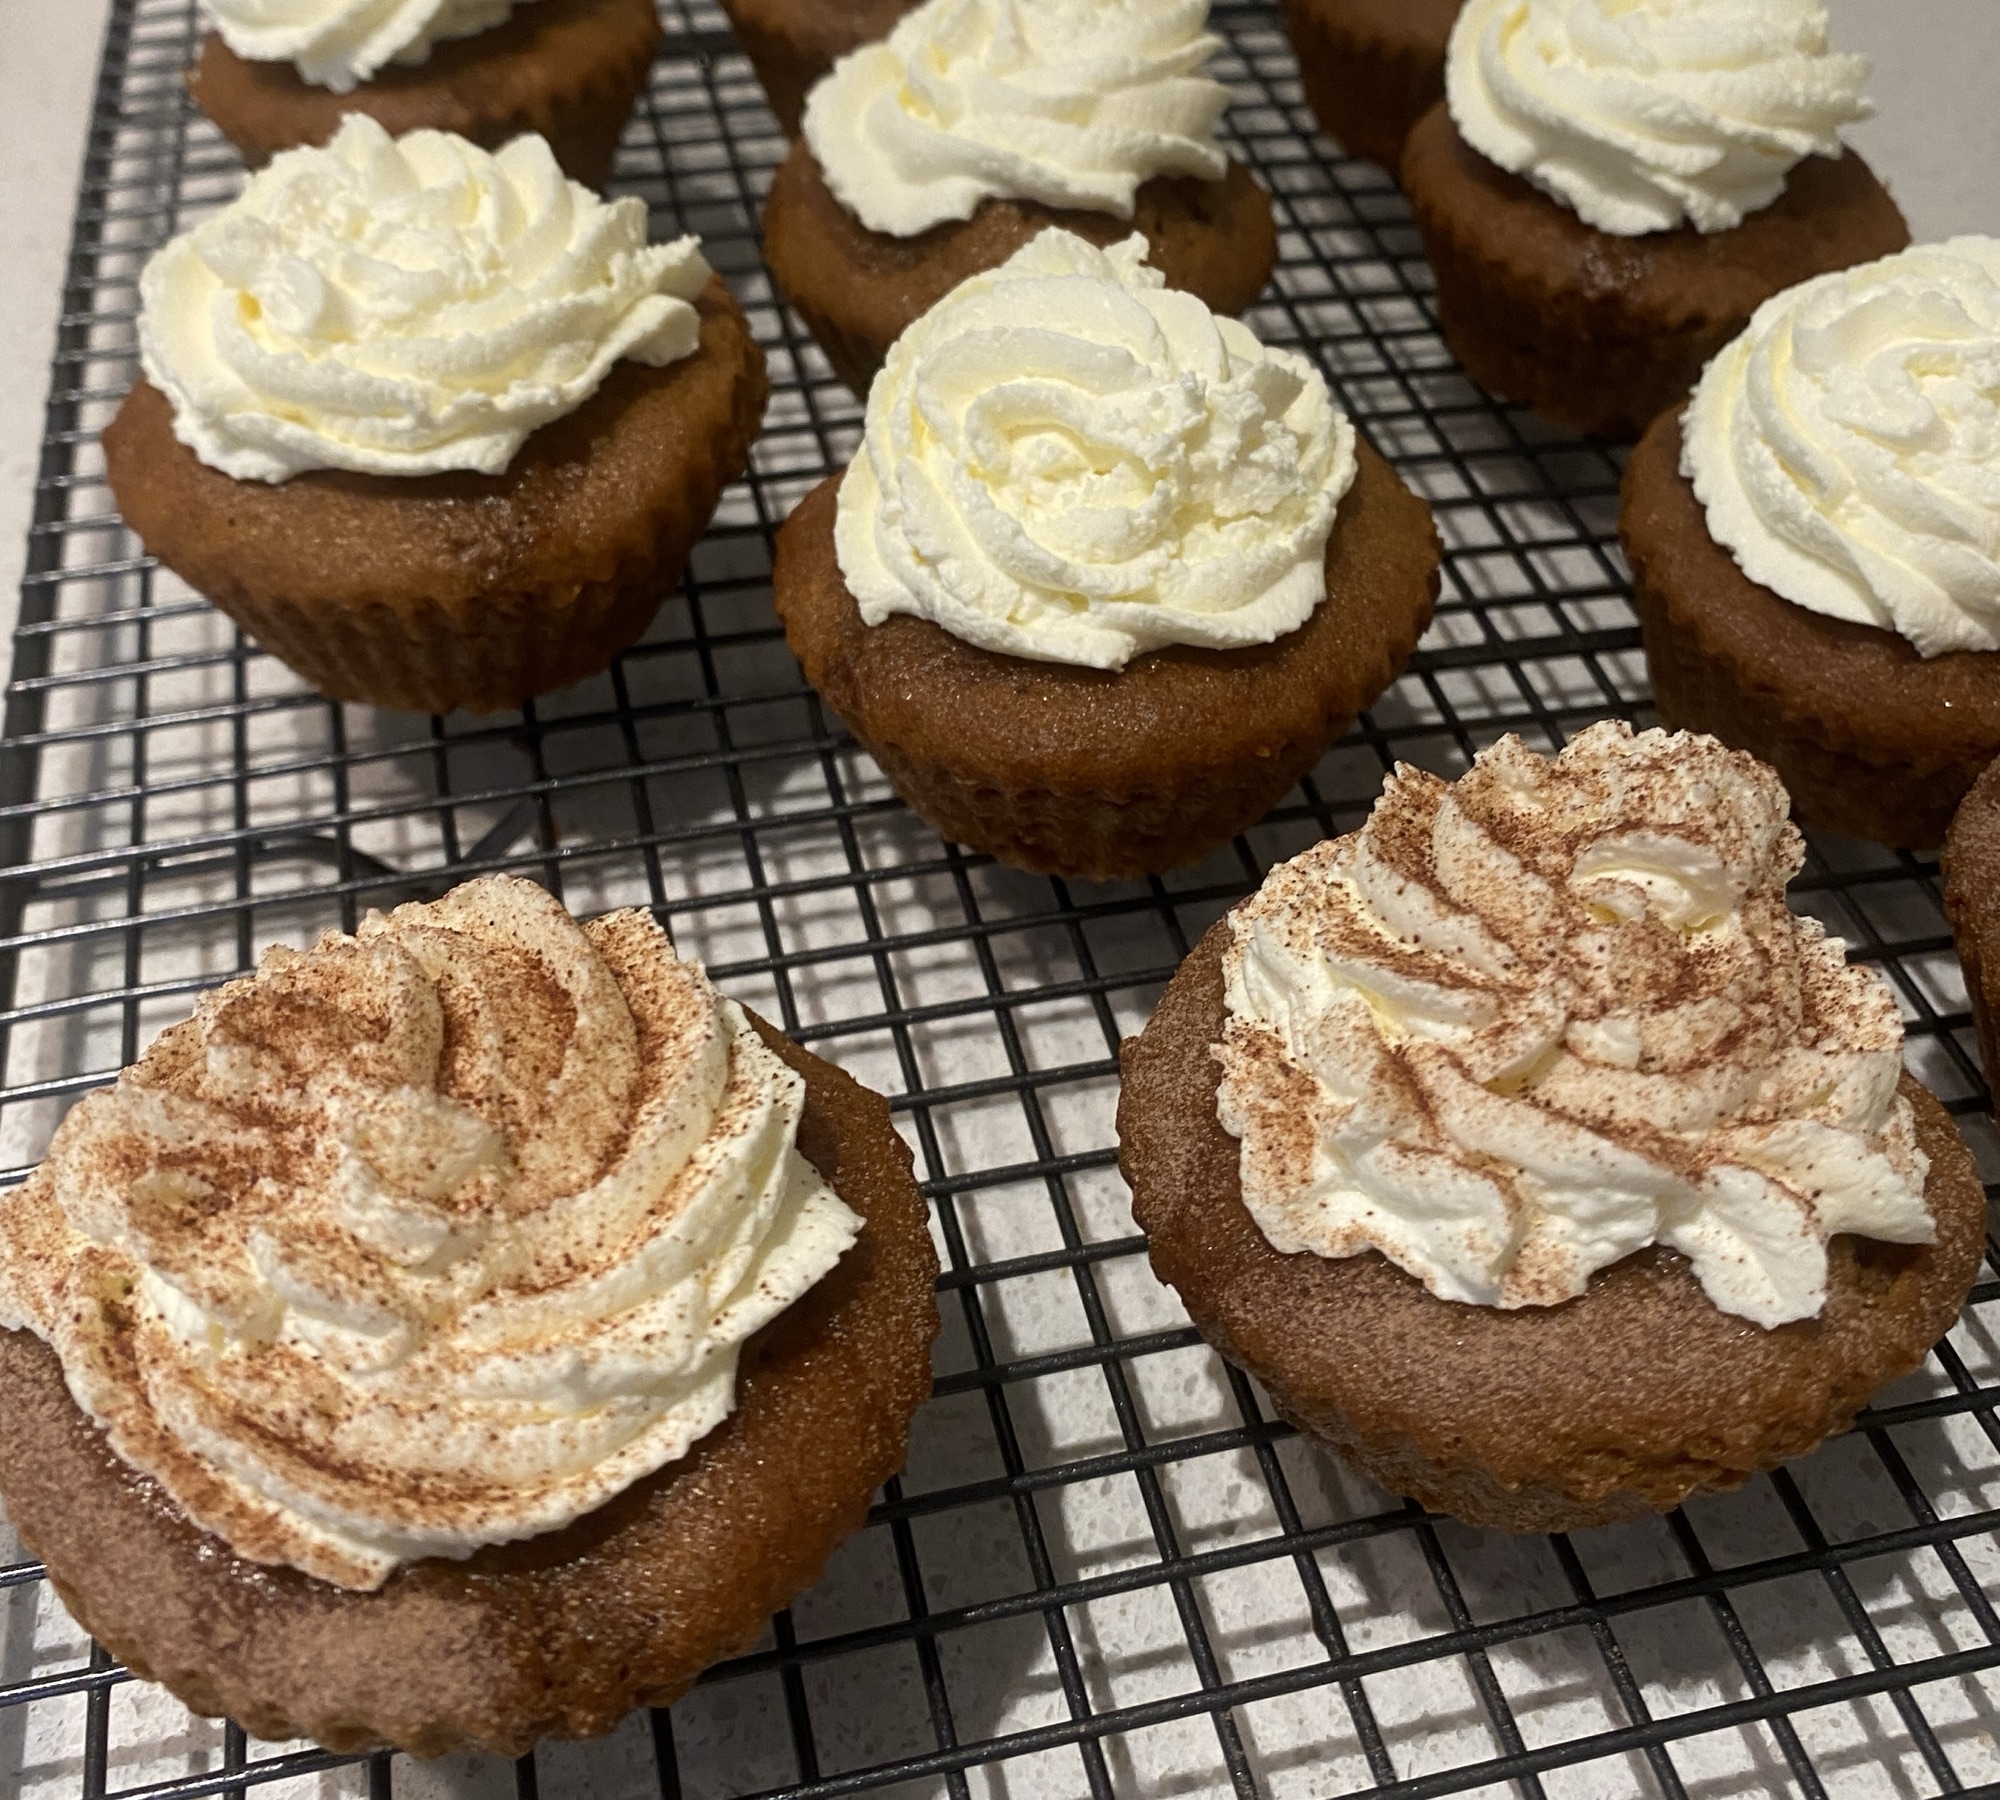
    A cooling rack with three brown coffee cupcakes with a whipped cream and mascarpone topping, sprinkled with chocolate powder. Others are in view at the back

    I don’t often make cupcakes but I invested in some silicon cases especially for these, and did a bit of research. There are loads of gluten free cupcake recipes. They tend to involve sugar, butter, SR flour, xanthan gum and eggs in various quantities (there was a surprising amount of variation) but on browsing specifically for coffee cupcake recipes, I came across a tip I had to test out. This came from the Gluten Free Alchemist, and it was to add some yoghurt to keep the cakes moist.

    I couldn’t follow her recipe as it was for coffee and walnut and included ground nuts, which I didn’t want to use in mine – so I borrowed the tip and created my own recipe using an amalgamation of what I’d seen on various sites. I’m not normally one for inventing baking recipes but this was a fairly low risk situation.

    There are two more important tips I learned which came in handy for this bake:

    1) Let your gluten free cake batter rest for 20 mins before baking it. Gluten free flours take more time to absorb moisture than regular flour, so resting helps soften the grains and improves the texture.

    2) If you’re using silicon cases, like I was for the first time, take the buns out before they cool, so they don’t go soggy from trapped moisture.

    So on to the recipe:

    To make 12 coffee flavour cupcakes, I used these ingredients:

    • 115g salted butter, room temperature, cubed
    • 30g caster sugar
    • 85g dark brown soft sugar
    • 2 large eggs, beaten
    • 115g gluten free self raising flour
    • 1 tsp baking powder
    • 1/4 tsp xanthan gum
    • 4 tsp espresso coffee powder
    • 3tbsp yoghurt
    • 1 tsp vanilla extract

    First, mix together the coffee, yoghurt and vanilla in a small bowl, and leave it to sit.

    Cream together the butter and sugar in a medium sized mixing bowl using a whisk.

    Add half the beaten eggs and sieve in half of the flour then continue to mix carefully with the whisk. Then add the remaining egg and sieved flour along with the baking powder and xanthan gum.

    Finally, mix in the yoghurt with the coffee and vanilla.

    Rest the mix for 20 minutes, during which time you can put the oven on and warm up a flat metal tray if using silicon cases. (I baked these at 155C to account for the silicon cases acting as an insulator).

    Spoon the batter into the twelve cup cake cases and pop them on the heated tray. Bake for 25 minutes. I turned mine round after 18 mins but as you can see they still have a slightly uneven rise, so next time I’d probably turn them a little sooner (not too soon to avoid collapse).

    After five minutes, remove from the silicon cases onto a cooling rack.

    If you’re using paper cases, bake at 170C for 15-20 mins

    What you can’t see from the screen capture below is how springy the cakes were. I can’t add a video here so here’s a link to my Instagram reel – it’s really worth a look. They were brilliant!

    Once cooled, I pricked the cup cakes with a skewer and drizzled in a mixture of Kahlua, espresso and icing sugar. Then I piped on a mix of my leftover mascarpone and double cream. Another top tip if you happen to be mixing these – if you’ve got more double cream than mascarpone, you can whip them both together in a bowl. If you have more mascarpone, you should just loosen it with a spoon then fold it in carefully to your whipped double cream, to avoid it splitting.

    For a finishing touch, I sieved a bit of drinking chocolate powder on the top. Ta da! They were delicious.

  • How to be Coeliac – Getting started

    How to be Coeliac – Getting started

    I have recently been asked for recommendations for someone newly diagnosed with Coeliac Disease, so I’ve been putting a few thoughts together, which I’m going to cover in a short series of posts.

    Firstly, changing your diet is a massive shock and getting used to it can have ups and downs, and at times be really upsetting or stressful. In the beginning it’s just about coping. Here are a few things that have helped me adjust over time and see the positives:

    • Try to think about all the things you can eat. That’s all meat, fish, vegetables, fruit, rice, dairy, nuts, pulses, herbs and spices. In their natural state they are all gluten free and can be combined in unlimited wonderful ways.
    • I found it helped once I could accept that some of my favourite foods are in the past and focused on finding new favourites, whether that’s go-to meals or sweet treats. There’s plenty to discover.
    • If you enjoy cooking, you can make pretty much anything gluten free, including things you’re missing out on like Chinese takeaway food or Yorkshire puddings. Don’t throw all your recipe books out – other than baking, many recipes can be adapted easily.
    • Once I got my head round what I can and can’t have in the supermarket, I tend to do my food shopping online, as it avoids me walking past all the food I can’t have.
    • As a mum and (for a while) the only Coeliac in the house, I found it weirdly helpful that I couldn’t eat all the sweets and treats the kids wanted – it forced me to stop scoffing everything in sight!
    • My food shopping morals had to be compromised a bit. Too much restriction is depressing and the price of gluten free food can be high, so it’s good to shop around – different shops have a different selection of free from products.
    • You will have to talk about gluten a LOT and think about it a lot – every single mealtime with little let-up. This can be overwhelming to begin with, but you get used to it and you’ll build up a set of stock phrases you can just rattle out.
    • My perception is that Coeliac disease isn’t as bad as an allergy, because there’s no risk of immediate death if you (or someone else) get it wrong. That’s not to say there are no consequences, but mine, at least, are relatively short-lived, if somewhat unpleasant and inconvenient. (I know it’s different for everyone though.)
    • This must be one of very few diseases where the treatment is changing what you eat, rather than medicine, injections or surgery. I was amazed when all the symptoms I had put up with for years disappeared because I stopped eating gluten.
    • You will get glutened at some point – it’s a learning process and once you get the hang of it, occurrences become rare.

    Unless you have symptomless Coeliac Disease, you’re embarking on a food journey that will make you feel so much better and your body will begin healing itself. Good luck!

    I’d love to hear other points of view about coming to terms with this big lifestyle change in the comments.

    In the next few posts, I’m going to write about my experiences of food shopping and cooking at home, brands I’ve found I like, tips for eating out, eating with friends and family, and I’ll point to some of the really helpful resources out there on the internet. There is a brilliant online community of people on the same journey.

    In the immortal words of Guns N Roses, welcome to the jungle. 🙂

  • Smoky ribs

    Smoky ribs

    We’ve been missing eating out during lockdown, and I feel like I’ve been cooking so much. I try to mix it up a bit so we have a lot of variety and I’ve subjected the family to all sorts of new recipes. Some have worked brilliantly, and some consigned to the ‘never again, mum!’ bin. This is one of the former and frankly, I regret not trying to make this sooner, as it was so easy!

    For the ribs, I bought 4 racks of ribs that had about 6-7 ribs on each, and one rack each was plenty for a main course with some sides. There are various recipes out there for smoky marinade, but I figured it’s pretty much the same as shop-bought BBQ sauce, so I just used a bit of Sweet Baby Ray’s BBQ sauce. I also use it for making pulled pork. These two dishes are the best things the slow cooker has ever produced.

    Run a small amount of oil around your slow cooker pan, pop in the ribs one rack at a time, and brush a bit of sauce on each. I had to overlap the ribs in a bit of a stack. Then cook on low for 7-9 hours or high for 3-5 hours. The time might depend a bit on your slow cooker, but mine is reasonably new and comes to temperature quite fast (considering it’s a slow cooker!) so it generally takes the lower amount of time.

    Once cooked, lift each rack carefully onto an oven tray, baste with more BBQ sauce and grill (or BBQ?) until they start to char a bit round the edges. 

    For the smoky beans, I use a fairly quick vegan recipe:

    • 1 shallot
    • 1/2 tsp cumin
    • 1/4 tsp smoked paprika
    • 1/2 tsp celery salt (I’m not sure you’d notice if this wasn’t in it?)
    • 1 tbsp tomato puree
    • 1 400g tin cannellini beans (or any beans)
    • 1 tsp maple syrup
    • 100ml tomato passata

    Soften the shallot in a bit of oil for 5 minutes. Add the spices and allow them to cook out for a minute before adding the tomato puree. Cook 2 more minutes then pop in the beans and the rest of the ingredients with some seasoning. Simmer until the sauce is the desired consistency. Add water if necessary.

    The slaw is a barbeque staple in our house, just shredded cabbage and carrot with full fat mayonnaise and a bit of seasoning.

    For the corn cobs, I like them best cooked on the BBQ but the weather wasn’t great, so we just cooked them in simmering water for ten minutes. 

    Enjoy! 

  • Packed lunch

    Packed lunch

    I often get bored with making packed lunches. I tend not to have sandwiches so usually I try to leave some leftovers from an evening meal or soup to make things easy. Even though I always make the boy’s packed lunch in the evening, it’s not unusual to find me in the kitchen in the morning trying to concoct something at the last minute for myself!

    A frequent choice for me is a slice of Unearthed Spanish omelette with some veg sticks. If I’m really short on time I occasionally grab a pack of beans and a bit of bread for toast – which I brown in a Toastabag in the work toaster. (These only cost a couple of pounds, and they last for ages, but they enable you to avoid cross contamination.)

    Yesterday and today’s effort for lunch was actually a rather good one, not least because I made two days’ worth in one morning.

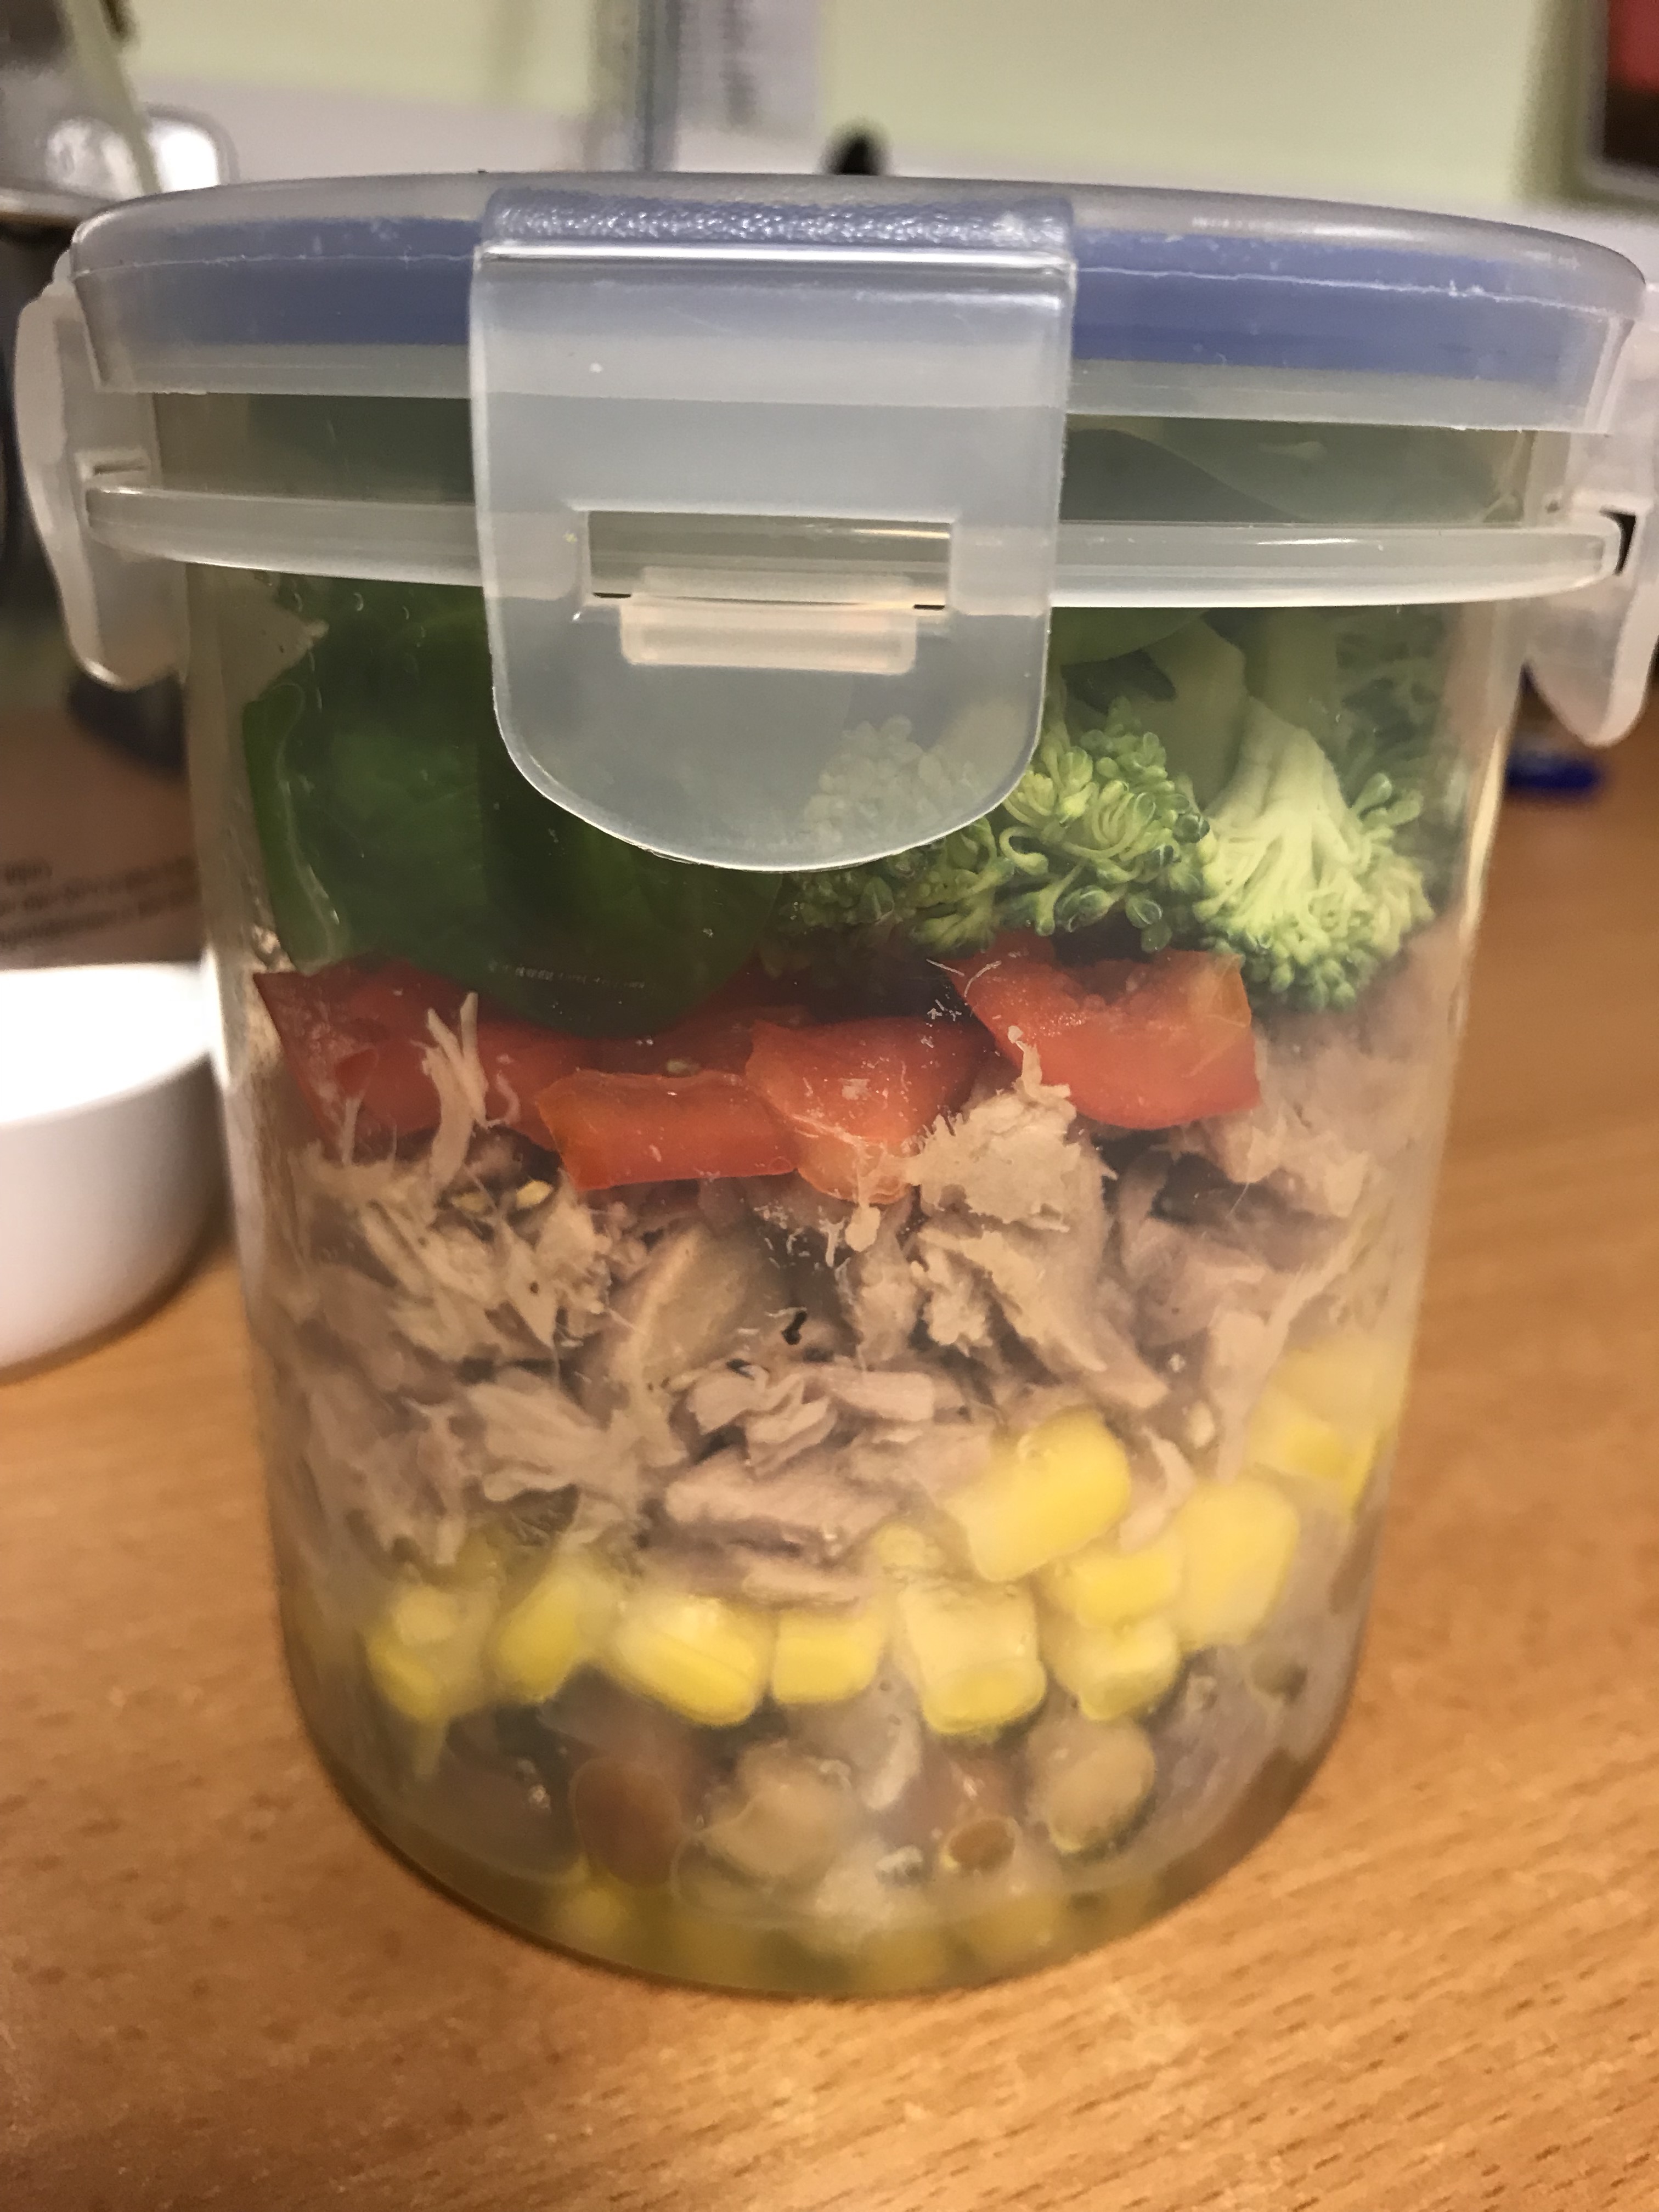
    These layered tubs of salad were all the rage in summer, and I saw many stylish versions in cute Kilner jars. Mine’s a more functional version, but at least the tub is round so it still looks vaguely appealing. And the tub was a bit bigger than it possibly should be, giving me a hearty Yorkshire portion!

    The trick is to layer the crunchy and non-squashable items in the bottom of the container, add a dressing, then put the softer leaves and things at the top. That way, you avoid soggy salad leaves by the time you get round to eating it.

    I went for quite a filling mix of tinned beans, sweetcorn, tuna, red pepper, broccoli and spinach leaves. For a ‘dressing’, I poured in some olive oil and lemon juice – not combined, the car journey does that – and a good grind of black pepper.

    So I felt very virtuous at lunchtime yesterday and today, with a sprinkling of smugness this morning for not needing to prep anything. I have nothing planned for tomorrow, so I may be back to the beans…